The third release in the exclusive PJM-Key Publishing laser-cut kit range is a ‘OO’ scale model of Norton Bridge signalbox on the West Coast Main Line. MIKE WILD offers top tips for its construction and shows how to paint it and install the new interior kit.
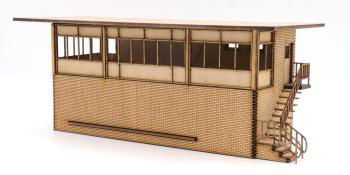
NORTON BRIDGE signalbox is an impressive building. It was completed in 1961 during the West Coast Main Line modernisation and continued in use until 2004 to control trains at the junction for the Crewe and Stoke-on-Trent lines.

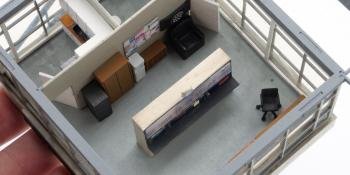
Our exclusive PJM Models kit launched in May (HM192) offering modellers an opportunity to add a large BR 1960s style signalbox to their layout – it measures 240mm x 150mm. Now we have introduced an add-on 3D printed interior kit from PJM Models created specifically for Norton Bridge signalbox using period images and first-hand information from signallers who worked in the ‘box.
Construction of the building largely follows the instructions, but to aid painting we held off installing the glazing and internal window frames until later in the build. This also meant leaving the interior wall partitions loose – the main stretcher being added to ensure the walls of the structure’s upper storey remained straight and square.